

ENGINE ROOM REFURBISHMENT – HEAT EXCHANGER – STAINLESS STEEL WATER TANK
After dealing with the water tank, it was now time to start the “Engine Chapter”: a major one indeed ! We were aware that the engine mounts had to be replaced. Two were broken but we decided to change all four of them.

One issue was that the previous owner had removed the base nuts on all four mounts when he repowered the boat. That left us with no possibility to align properly the engine to the shaft.
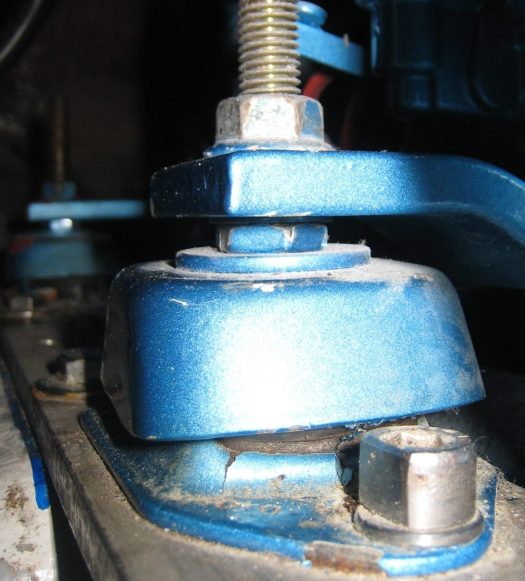
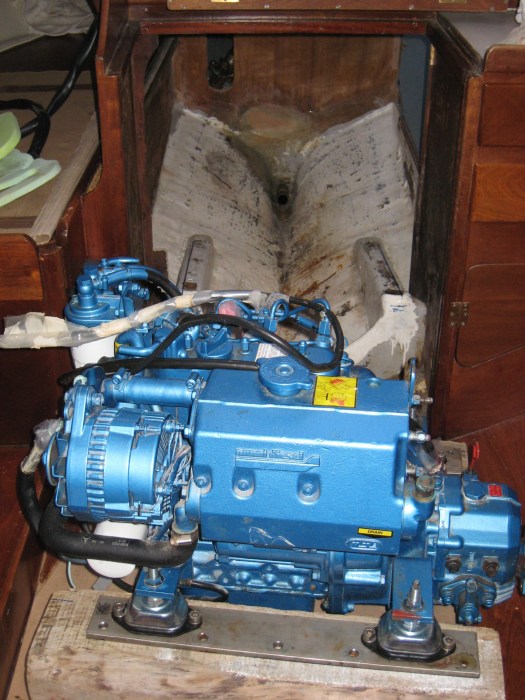
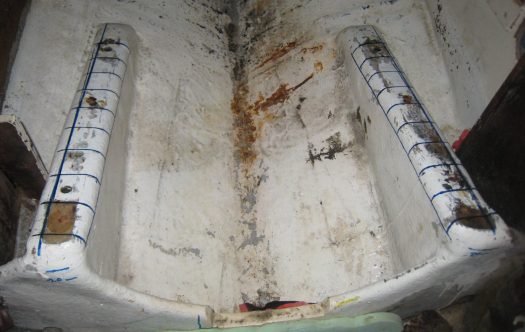
The engine had previously been stepped on two stainless steel flat bars. This is a common technique to reduce the width of engine beds. But those flat bars were half in the air. We thought it was a bit awkward and that the engine needed a better support. We also had to reduce the original height by approximately 20 mm to compensate the missing nuts of the mounts.

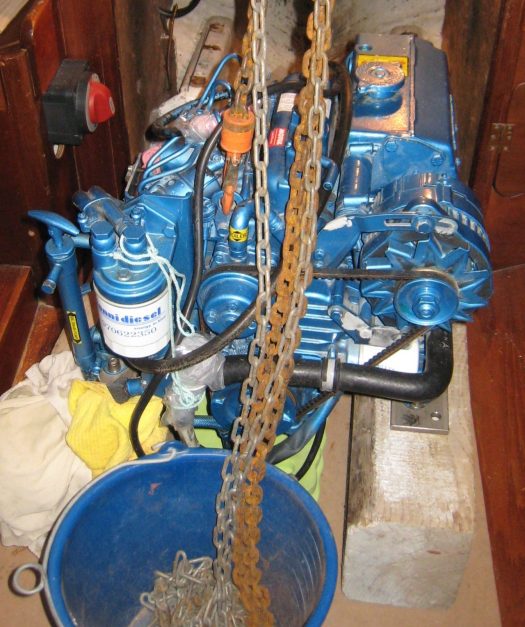
The first step was to lift out the engine. Then move it on two pieces of timber which had the required height.
For this job we used a manual chain hoist and a piece of hard wood across the companionway.


This manoeuvre ended up been quite easy. Our 3 cylinders Nanni engine is weighting about 110 KG and we managed to accomplish the task only the two of us.
The engine room was finally empty and ready for a total refurbishment.
The old engine mounts.
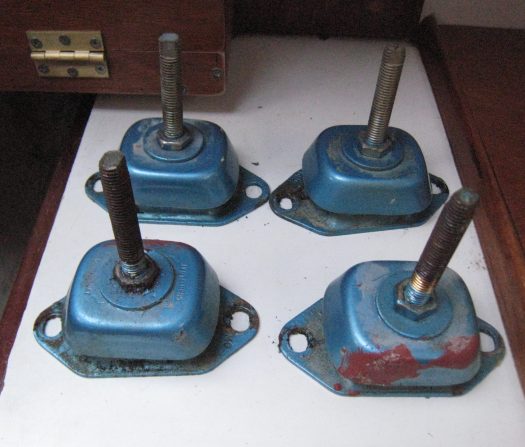
And the shiny new ones !

After removing the engine we scraped off the old insulation which was in a sorry state.

The perfect working place, if one has the right body proportions! 😉

After clearing up the old insulation, the engine room was beginning to look a bit better, but still there was a lot to be done.

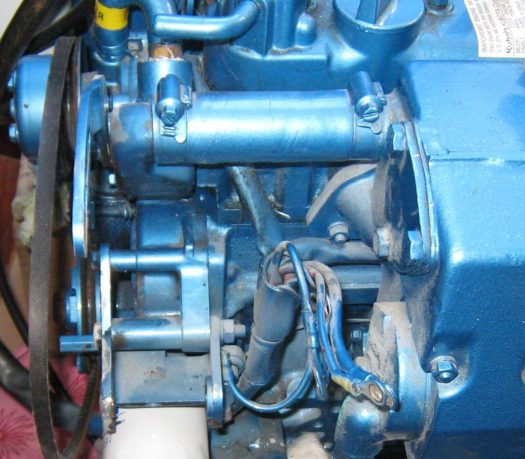
The engine had to be lifted again and turned around in order to gain some extra working space.
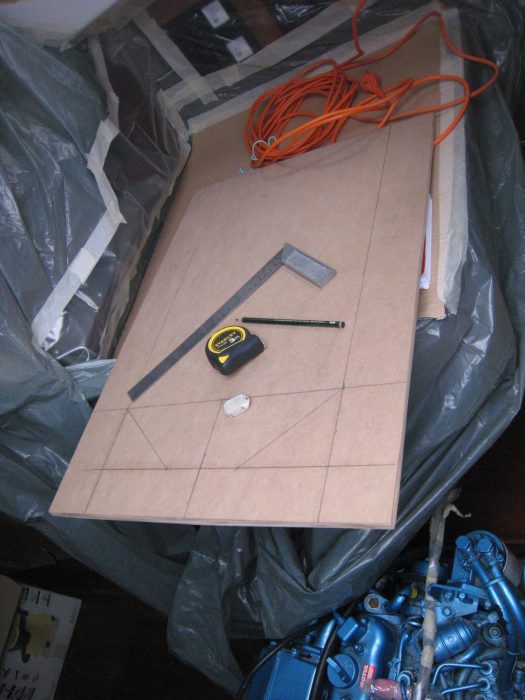
A template was created with 10 mm MDF including the exact engine measurements. This is an essential step before starting cutting through the old engine beds.
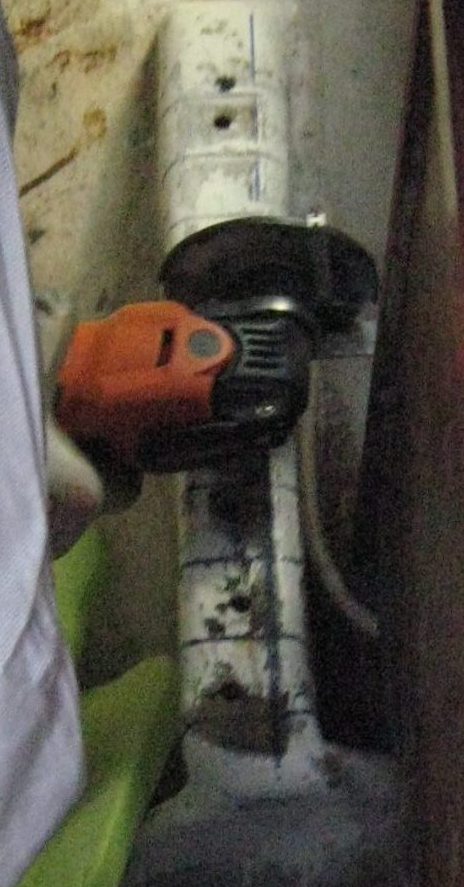
Cutting through those GRP pieces was going to be another story. The question was: what tool could we use to achieve a clean and accurate cut. One option was to use a grinder, another option was to use an electric sword saw. But we discovered a magic tool that would make everything easier, less dangerous and much cleaner: The Fein Multimaster ! This is a real must for any boat builder ! Sadly we discovered it a bit late on this refit project.
One of the accessories which can be fitted on a Fein is a HSS cutting disc with a depth stop, ideal for precision cuts. We used it to slice the engine beds to the exact depth that was needed. The blade went through the thick GRP and the encapsulated wood without any difficulty !
The cuts were nearly perfect. And the good news was that the encapsulated wood was in perfect condition after 42 years !

The area was sanded thoroughly with one of Fein’s sanding pads (40 grade). A great feature of this tool is the possibility to connect to a vacuum cleaner. That made the sanding completely dust free and saved us from a big mess !
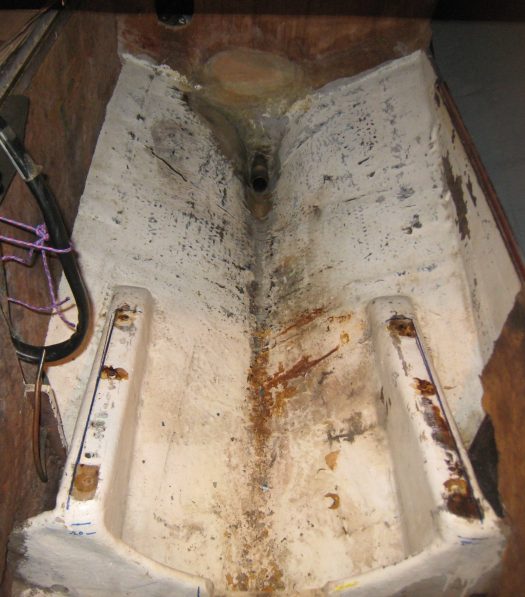
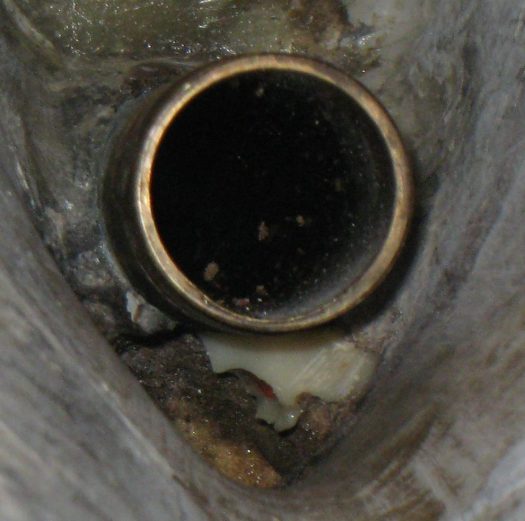
This is the stern tube extending inside the boat. A very important spot were the stern gland is going to be connected in the future.
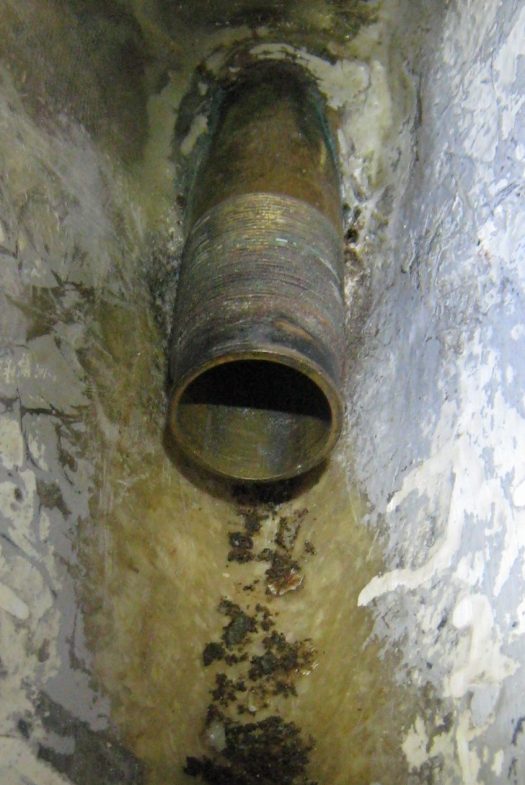
We checked for any dezincification of the bronze tube, but it looked in good condition. What we discovered though, was a hole underneath which was filled up with dirt and some kind of old polyurethane foam mixed with resin. All this mess didn’t look very appealing. After further investigations we are now thinking that this is were the water dripping from the stern gland, found its way inside the skeg.
Christmas Eve and Santa Claus found us at the boat yard, like the last couple of years.

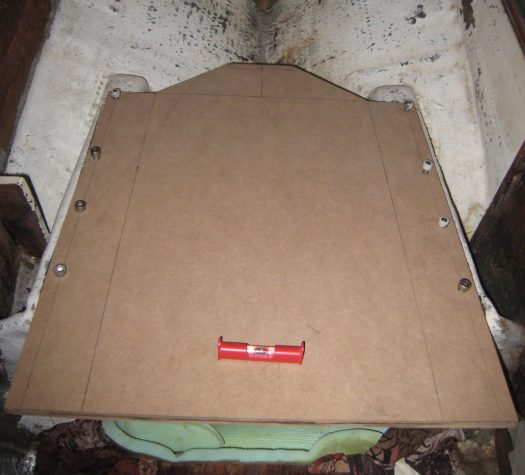
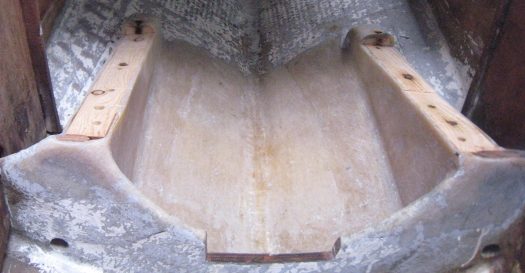
These pieces of plywood are made to extend the width of each engine bed. We used 25 mm thick marine plywood. Those pieces will be bond to the existing beds and then laminated with fibreglass cloths and epoxy resin.

To make sure the two beds were at the same height, we used a small spirit level taped on a straight piece of aluminium. It took few corrections with the electric plane to get the perfect adjustment. Unfortunately the temperatures didn’t permit us to start the epoxy works straight away.

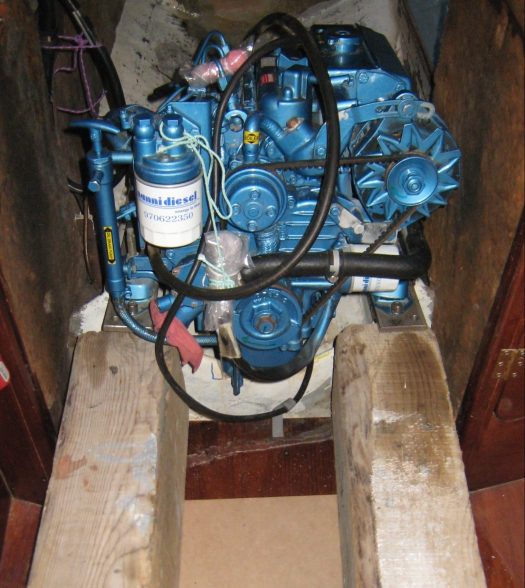
We decided to have a closer look on the engine. It was a good opportunity to undergo an overall examination now that it was out. This is a Nanni Diesel 3.75HE and is quite new. The engine has about 700 hours but, we found out that the weak point of this model is the heat exchanger. After some difficulty, we first took off the back cap.
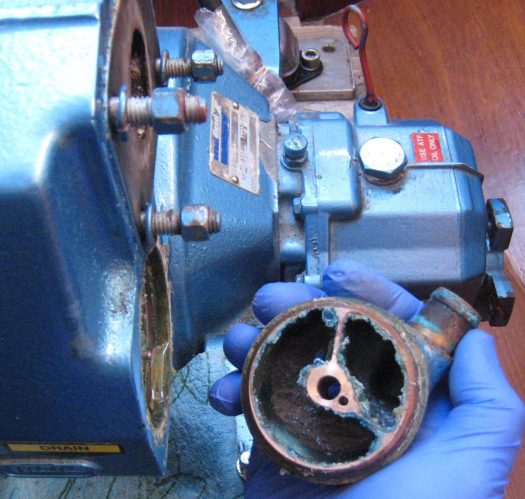
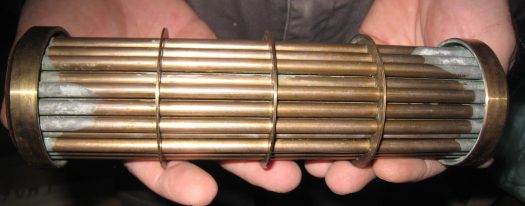
To open the front cap, we had to dismantle the alternator. This was essential in order to extract the copper tube.

The hidden objects… what can you see? The cap revealed a surprise !

Four pieces of old impeller hidden inside. A serious obstruction to the cooling system !
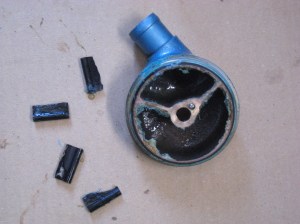
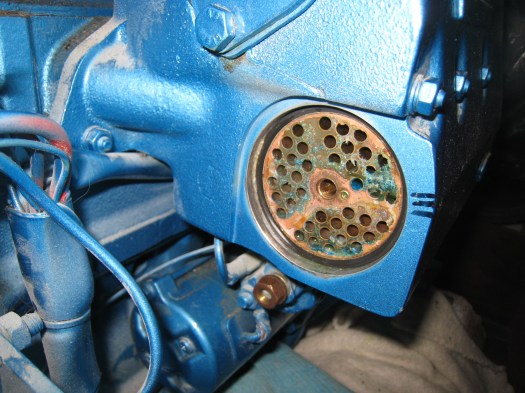
On the back of the heat exchanger, we could spot signs of corrosion. That is the weak point of this engine. It seems that the o-ring insulating the copper tube from the bronze cap doesn’t do its job properly. Fortunately on french sailing forums we found a lot of informations about this issue. It looks like this problem is pretty common on some Nanni models.

On the other hand, the copper tube itself wasn’t in a bad shape at all. After the extraction, it only needed a bit of cleaning with white vinegar and water.

The interior of the heat exchanger was also in perfect condition. We cleaned it thoroughly and were quite happy to observe that there was no corrosion inside.

As we mentioned earlier, the only spot that was a bit eaten by electrolysis was at the back. An area which in the future should be examined once a year. We also found out that Nanni Diesel is now providing a new type of o-rings which should solve the problem .

After all this, we thought it would be a good idea to also examine the thermostat. This piece was extracted quite easily by undoing three hexagonal bolts.
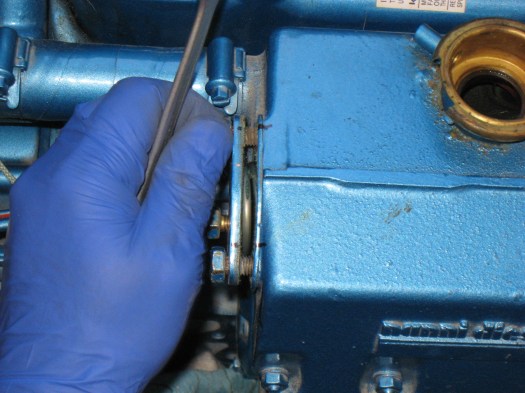
We found inside a spring pushing the thermostat in his cavity.

The other area which was deteriorated was behind the flange of the exhaust elbow. A common place to corrode due to the warm salty water coming out. We must admit we were expecting to find these parts in a worst condition. Nevertheless, it seems that new alloy materials are much more sensitive regarding corrosion when compared with the older marine engines.

The thermostat cavity was also in perfect condition.

The layout of the engine parts ! Since we are not professional engineers, we need to be very methodical and organised in order to remember what is what !

The new exhaust elbow. Another piece of cast aluminium which will corrode if we don’t change the anode frequently.

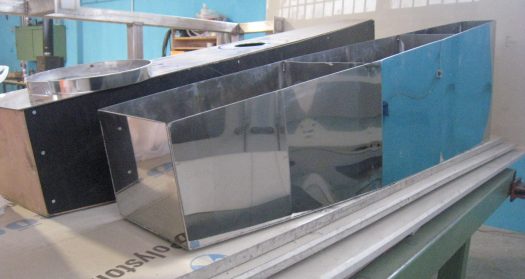
At the end of the month, we had a nice surprise. Our new stainless steel water tank was about to be completed. We went to the work shop and discussed the final details.
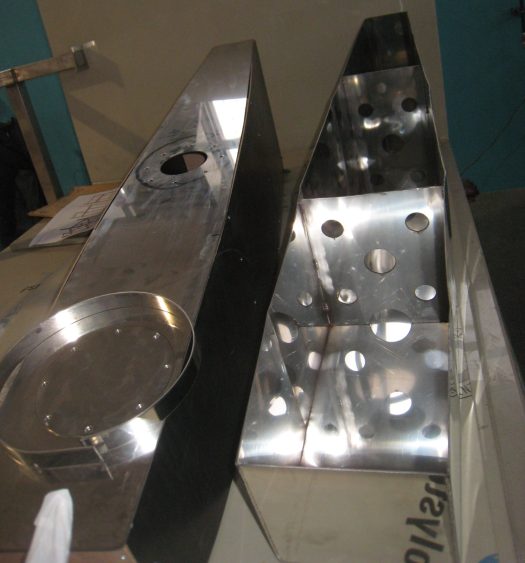
Before welding the top cover, we decided where about the elbow pipes will be installed. There should be four different fittings: inlet, feed, vent and a spare thread.

A brand new water tank in 316 stainless steel, shining like a mirror !

Impressionnant ton explication et le boulot! Bisouxxx
>
LikeLiked by 1 person
thank you very much for sharing! outstanding!
This helps me a lot: I have an old sail boat with a Nanni 2.50he, the person who took care of her unfortunately has died and I have no experience…. Please keep sharing 🙂
LikeLiked by 1 person
I appreciate your work, thanks for all the great content.
LikeLiked by 1 person